Thursday, January 26, 2012

Our very own 'The famous Malabar Parotta'


Hey friends, this recipe is from my younger daughter who is very interested in experimenting new dishes in her kitchen. She enjoys cooking and I appreciate her determination to keep trying out new dishes till she attains perfection. The credit of this recipe goes to her :):) Now, upto my younger daughter's recipe as narrated to me.

During my childhood days, I used to visit Kerala quite often during the  summer vacations. I cherish the numerous road trips along the Western Ghats travelling in Tata Sumo filled with the chit chat and the bantering of a group of cousins, all of us almost of the same age group. This was one of the last vacations before my marriage that I spent time with my folks there. Within the first couple of days after reaching Trivandrum, I made sure to stop by at my favourite roadside stall to savour the most amazingly freshly made parotta alongwith korma.  Usually, I would think that the side dish is the 'star' but this was one time when  the soft and flaky parotta was the 'star'.

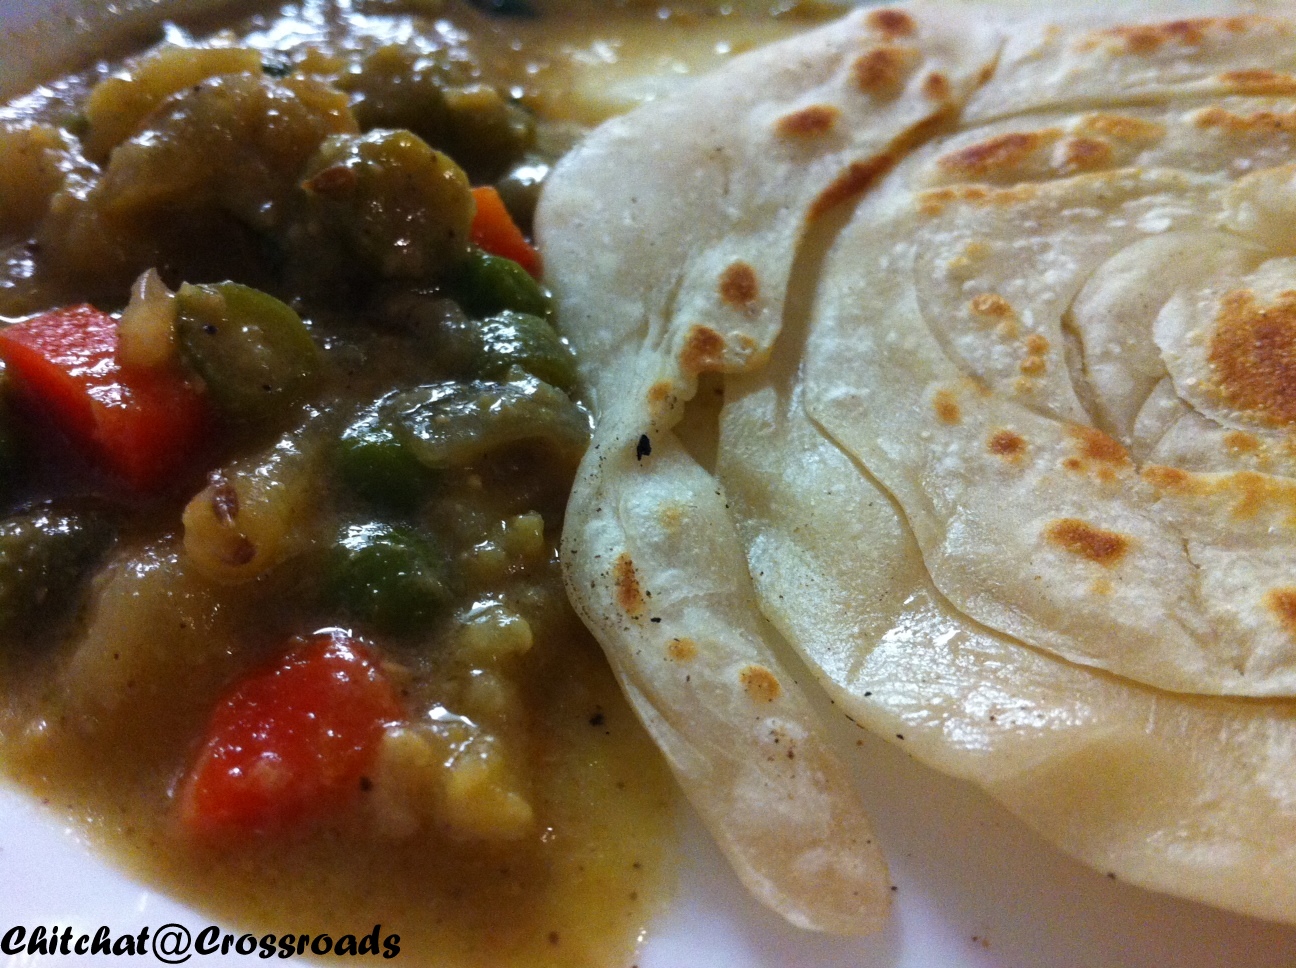
Here is my first attempt at making the Parotta and korma. The vegetable korma that is coming up is my mother-in-law's recipe. I wanted to go the authentic way and pair it with Malabar parotta. Here is the recipe and this needs a little patience and the results are delicious and definitely worth it.

Maida (All purpose flour) - 2 cups
Milk - 1/4 cup
Oil - 1/4 cup
Water as needed.

Step 1: Mix in the maida and the warm milk and make it into a soft dough by adding just enough water. Work the dough for five minutes until it has a smooth texture.

Step 2:Apply oil to the entire surface of the dough. Cover it with a clean cloth and allow it to rest for ten minutes.

Step 3: Break the dough into balls of a big lemon.  Roll each ball and apply oil to the surface of the balls. Cover it again with a clean cloth and let it rest for five minutes.

Step 4: Flatten out the dough to the size of your palm. Apply oil uniformly to each of the flattened surface and let this rest for ten more minutes.

Step 5: Roll out the flattened dough very thinly (Almost like a tissue paper).
Step 6: Cut this diagonally and roll each section starting from the center.

Step 7:Twist the diagonal sections into concentric circles. Cover this concentric circles in a muslin cloth until you are ready to make the parottas.

Step 8: Flatten out the concentric circles to the size of your palm.

Step 9:Apply oil on the tava and cook the parottas on medium heat.

Step 10: Use your fingers to apply some pressure on the parottas to bring out the flakiness.

Yummy flaky parottas are ready to be served. Korma recipe to follow soon.

Monday, January 23, 2012

A cup of hot coffee!!!!!!!!!!!!!!!!


As I am sipping my morning coffee, I am drifted back to Chennai. The best coffee I have ever had is of course brewed by my mother. We had a traditional manual, metal coffee grinder attached to a wooden shelf. Amma used to buy 'A' and 'P' raw coffee berries and store them. Daily evening, she used to roast these berries in dry kadai and cool it for grinding. I cannot express in words the aroma of the roasting  bean. It used to be my daily job to dry grind the coffee powder for the next day.


There was no storing of milk in the fridge as we do nowadays. Early morning, the milkman used to come with a couple of cows and buffaloes. He will start milking after showing the container to us. It is assumed that the container does not have any water inside. Within 10 minutes, we can get frothy fresh milk which goes into a vessel for boiling. Meanwhile, the coffee powder goes into a filter and hot boiling water is poured into it. If we need thick decoction, less water has to be put. Within 15 minutes, thick first decoction is obtained.

Coffee is prepared in a vessel by adding milk, little water, sugar and the decoction. The prepared coffee is poured in stainless steel tumblers which is kept on a small bowl called 'Davara'. This 'Davara' serves as a bowl to cool the coffee and drink if someone finds it very hot.  Then hot water is again poured into the filter to obtain the second decoction which is slightly a diluted version. Sometimes, when we have many guests, Amma used to take out her big brass coffee filter which used to accommodate around 200 gms of powder at one time.

Not a day goes by, without a guest at home coming around in the morning for Amma's coffee.  I remember my Appa's friends who just drop in to say 'Hello' and have a cup of coffee and leave. Those were the times when guests could drop in at any time of the day.

No matter what the temperature is in Chennai, we do not mind a hot cup of coffee in the morning. I have my traditional filter here and get a Kilo of ground coffee powder from 'Coffee Day' and store it and would enjoy filter coffee till the powder gets over. Then, over to Maxwell!!!!!

My coffee in the ceramic mug has become cold, let me go and heat it up in the microwave :(:(

Wednesday, January 18, 2012

Yummy Pumpkin cup cake


New Year and Pongal wishes to you all, although a bit late.  I was flooded by relatives and family over the past month and was extremely busy with the guests. Felt very guilty at neglecting the blog site but literally could not find time. This one was drafted last month and hope you all enjoy it. This is my elder daughter's recipe and the credit goes to her. Since,she could not post it, I am doing on her behalf.


It is a big trouble to keep thinking what to do with the Halloween pumpkin.  Usually the carved and lit pumkin would adorn my porch for sometime till it had to be discarded. But, this time with the addition of my second one and keeping pace with his crawling, it was difficult to cut and carve. Hence, the pumpkin was lying unattended. Only the costumes and the sweets came to the forefront. Not wanting to waste it, was looking out for some nice recipe to bake a pumpkin cake. Found this one here and was an easy preparation. The taste was amazing and this is the fourth time I am baking this cake since Halloween :):) A big thanks to Diana for her recipe. I send them  to my daughter's class and the surprise look at tiny tots' faces was unforgettable. I came to know from the teacher that everyone loved these and wanted a second one. This is the perfect verdict..

Here goes the recipe:

All purpose flour - 2 1/4 cups
Sugar - 1 1/3 cups
Butter - 1/2 cup (at room temperature)
Cooked/canned pumpkin - 1 cup
Eggs - 2
Milk - 3/4 cup
Baking powder - 1 tbsp
Baking soda - 1/2 tsp
Cinnamon powder - 3/4 tsp
Nutmeg powder - 1/2 tsp
Ginger powder - 1/2 tsp
Salt - 1/2 tsp

Sift the dry items and transfer into a bowl.  Mix butter and sugar until  light and fluffy.  Beat the eggs and add to the butter sugar mix.  Blend the mashed pumpkin to this mix. Add the dry ingredients alternating with milk into the butter-sugar-eggs-pumpkin batter blending well after each addition. Spoon the batter in greased cups.  Bake at 375 deg for 25 minutes.

Yummy cup cakes are ready to devour.
Related Posts with Thumbnails